Login
1. You can login on the CLI from your browser using OAuth2.
1. You can login on the CLI from your browser using OAuth2.
To log in to your Lightdash instance using OAuth2, run the following command:where 
{{ lightdash_domain }} is the address for your running Lightdash instance. For example Lightdash cloud users in the US would type lightdash login https://app.lightdash.cloud if you’re in Europe you’d typelightdash login https://eu1.lightdash.cloud.This will open a new tab in your default browser. Log in to your Lightdash account (if you’re not already logged in), then authorize the lightdash-cli client.Once authorized, you’ll be logged in and ready to use the CLI.2. If you use your email + password in the browser, login with your email and password.
2. If you use your email + password in the browser, login with your email and password.
To login to your Lightdash instance run the following command and provide your login email and password:where
{{ lightdash_domain }} is the address for your running Lightdash instance. For example Lightdash cloud users in the US would type lightdash login https://app.lightdash.cloud if you’re in Europe you’d typelightdash login https://eu1.lightdash.cloud.3. If you use single sign-on (SSO) in the browser, login with a personal access token.
3. If you use single sign-on (SSO) in the browser, login with a personal access token.
First, you’ll need to create a new personal access token in the UI by going to Settings > Personal Access Tokens. You can’t use an existing personal access token! You have to create a new one just for yourself.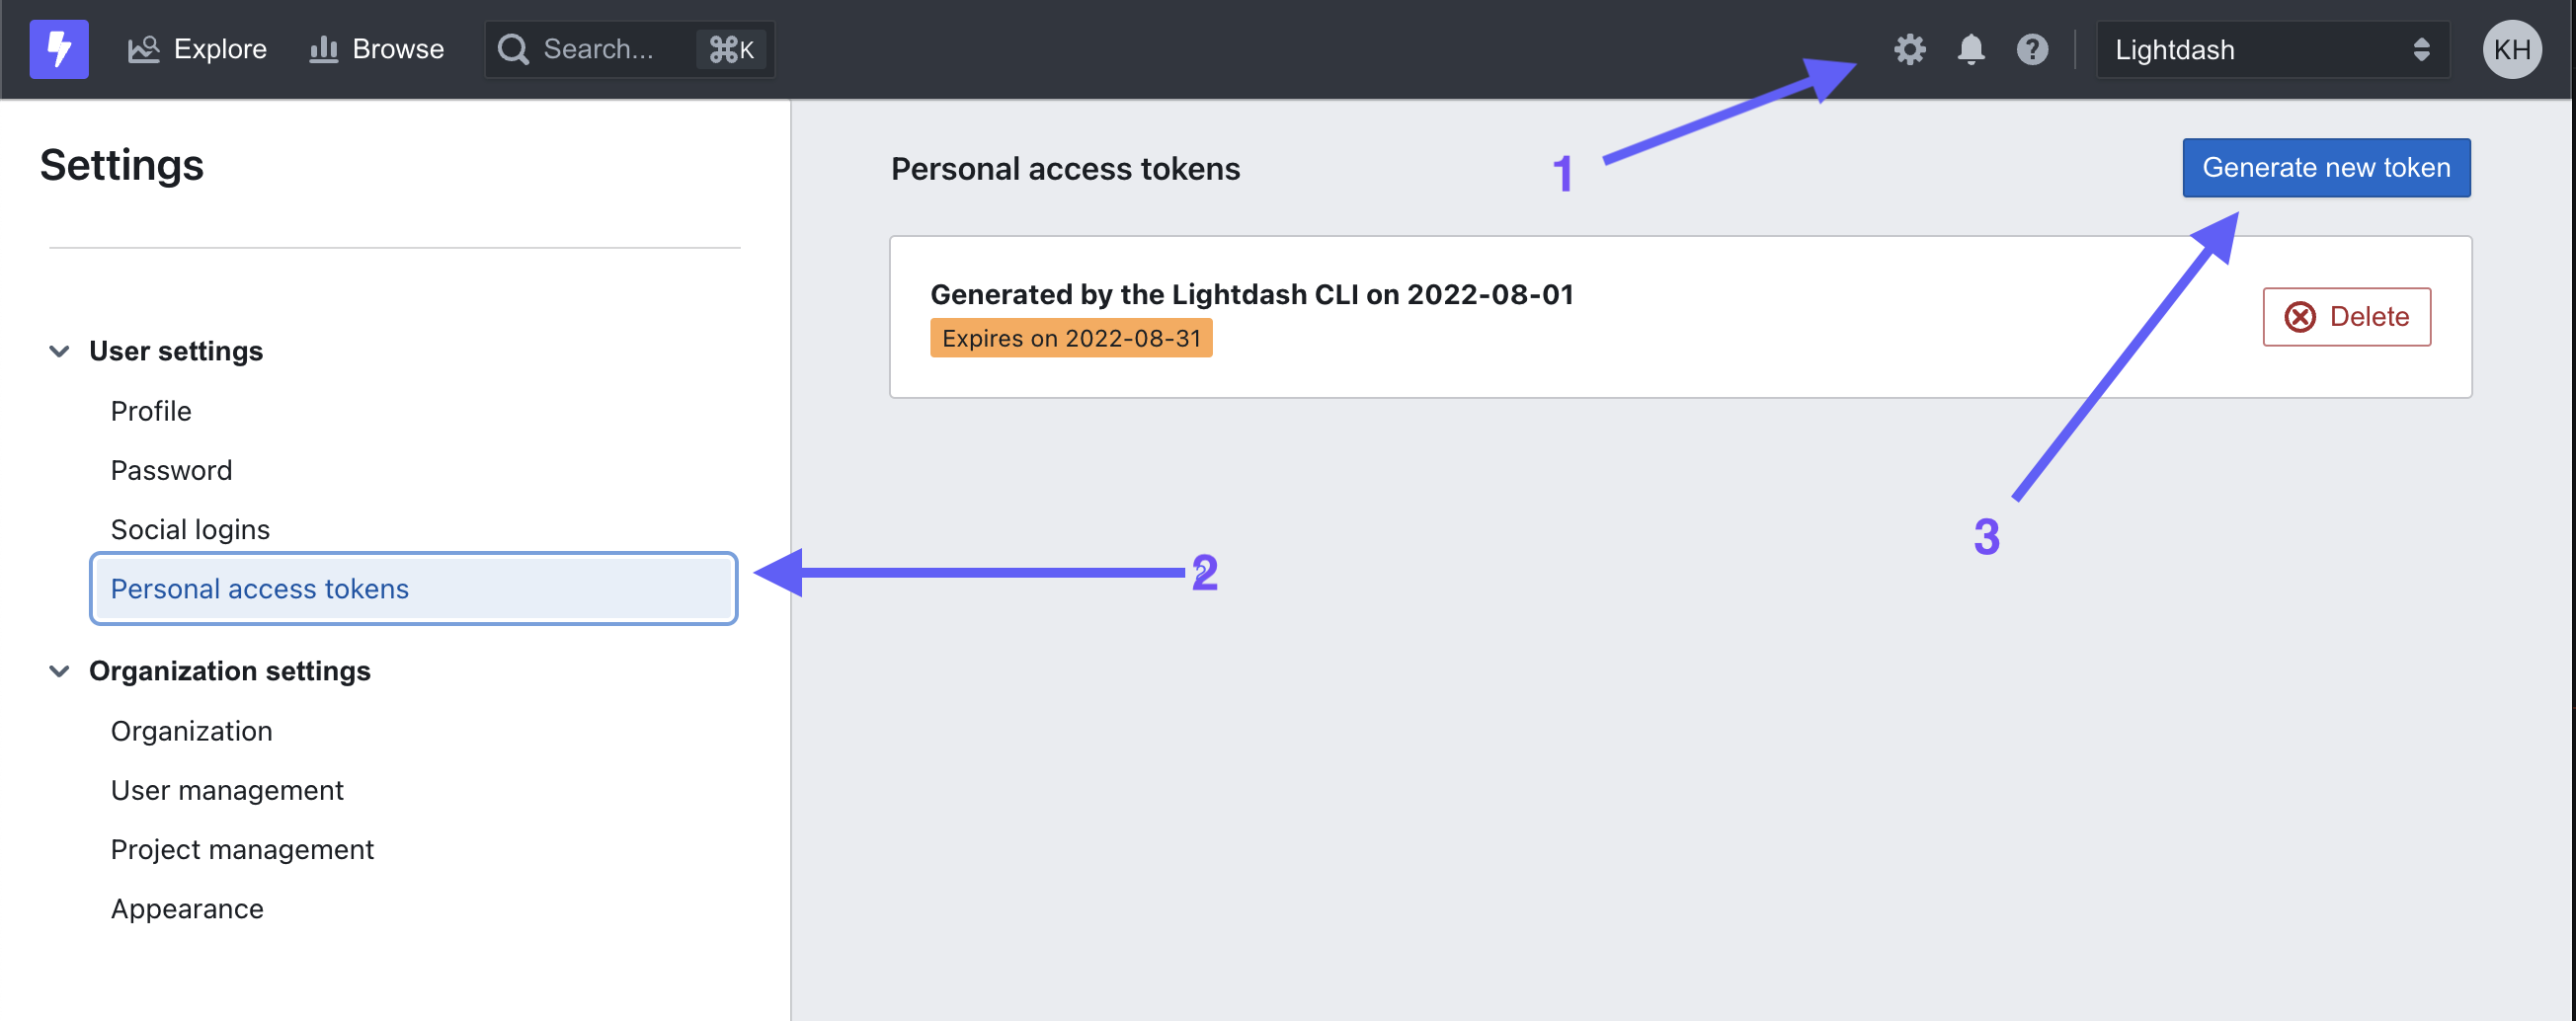
https://my-lightdash.domain.com is the address for your running Lightdash instance. For example Lightdash cloud users in the US would type lightdash login https://app.lightdash.cloud if you’re in Europe you’d typelightdash login https://eu1.lightdash.cloud.4. If you're running in a CI/CD pipeline, login with environment variables
4. If you're running in a CI/CD pipeline, login with environment variables
You can use the following environment variables to authenticate yourself on each command:Where
- LIGHTDASH_API_KEY a personal access token you can generate in the app under the user settings
- LIGHTDASH_URL address for your running Lightdash instance
-
LIGHTDASH_PROXY_AUTHORIZATION if your Lightdash instance is behind a proxy like Cloud IAP you can set here
Proxy-Authenticationheader value
{{ lightdash_domain }} is your domain. For Lightdash Cloud users use https://app.lightdash.cloudSet active project
When you login you’ll be asked to set an active project. Your active project is just the one that you’re working on/developing in. Your organization might just have one project, so that makes your decision easy! You can change your active project by running:LIGHTDASH_PROJECT environment variable to indicate what project UUID the command should use.
Example: